The old version is still available here
Stream video files
This guide will show you how to send video files into Mux and get them ready for HLS playback. If you don't know what HLS is, don't worry, we'll talk about that later. Let's start by getting one of your videos into Mux.
In this guide:
1
Get an API Access Token
Get an API Access Token
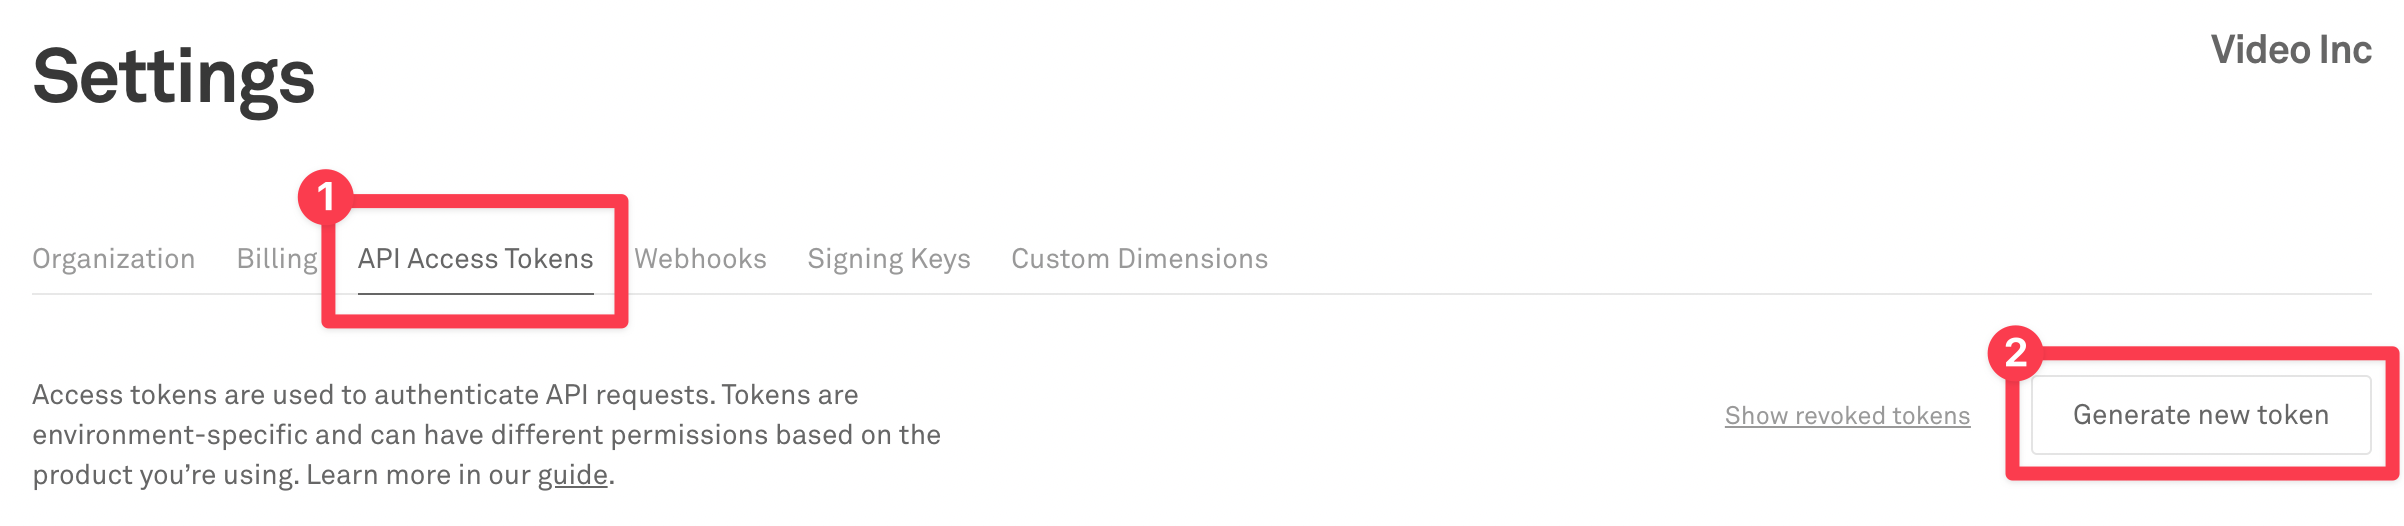
The Mux Video API uses a token key pair that consists of a Token ID and Token Secret for authentication. Generate a new Access Token in the settings of your Mux account dashboard.
2
POST a video
POST a video
Videos stored in Mux are called assets. To create your first video asset, send a POST request to the /assets endpoint and set the "input" property to the URL of a video file that's accessible online.
3
Wait for "ready"
Wait for "ready"
As soon as you POST a video, Mux begins downloading and processing the video. For shorter files, this often takes just a few seconds.
4
Watch your Video
Watch your Video
To play back an asset, just create a playback URL using the PLAYBACK_ID you received when you created the asset.
5
Manage your Mux assets
Manage your Mux assets
Delete, update, and more asset functionalities are available via the Video asset API methods
6
Video FAQs
Video FAQs
View commonly asked questions about video
1Get an API Access Token
For a guided example of how to make API Requests from your local environment, see the guide and watch this video tutorial: Make API Requests.
The Mux Video API uses a token key pair that consists of a Token ID and Token Secret for authentication. If you haven't already, generate a new Access Token in the Access Token settings of your Mux account dashboard.
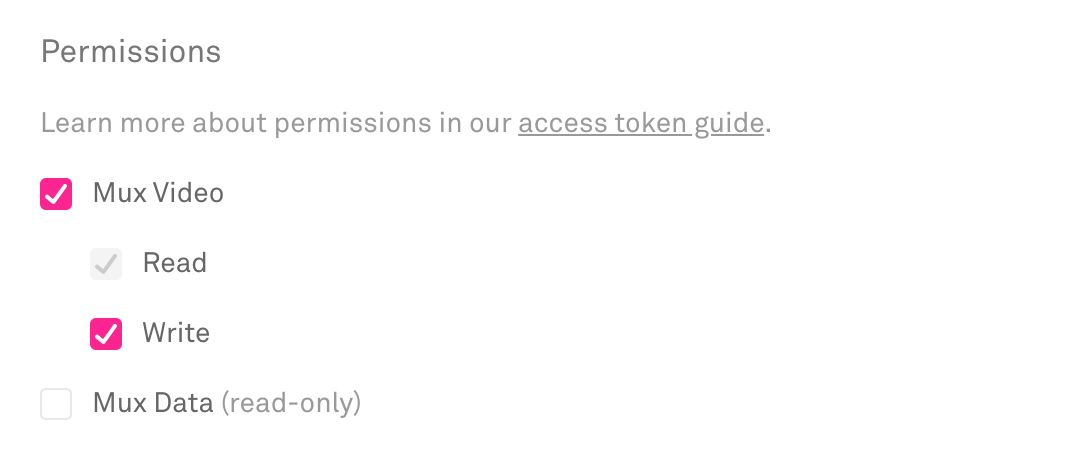
The access token should have Mux Video Read and Write permissions.
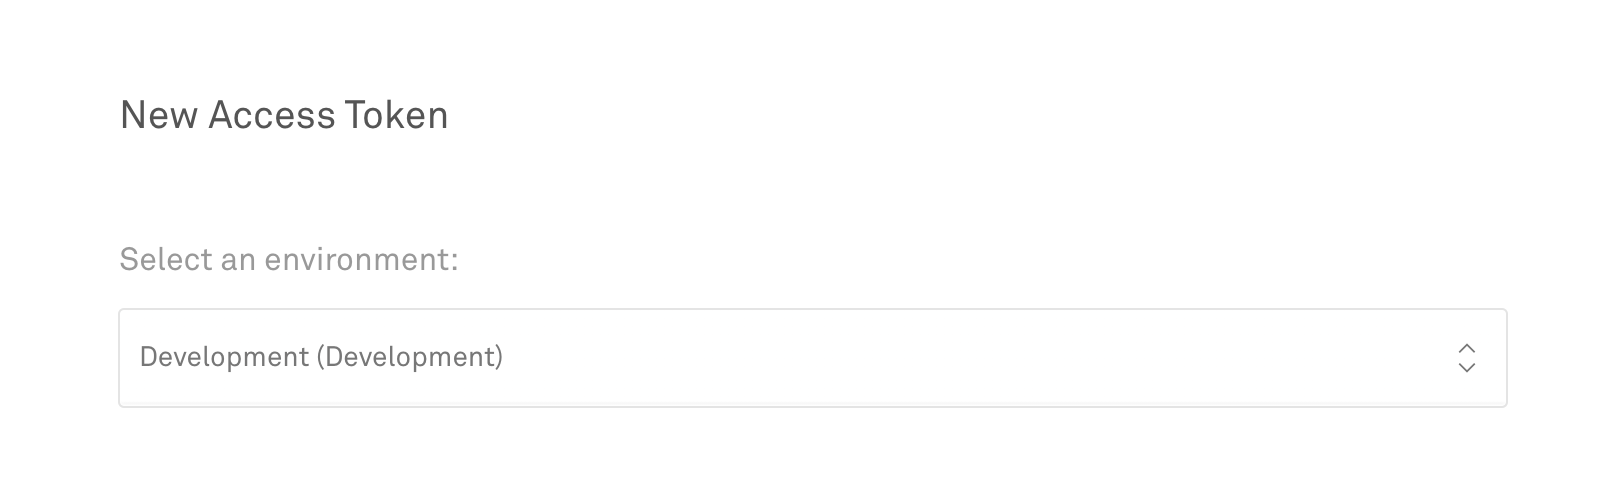
Access Tokens also belong to an Environment. Be sure to use the same Environment when using Mux Video and Mux Data together, so the data from Mux Data can be used to optimize your Mux Video streams.
2POST a video
Full API ReferenceAPITo start making API requests to Mux, you might want to install one of our officially supported API SDKs. These are lightweight wrapper libraries that use your API credentials to make authenticated HTTP requests to the Mux API.
# mix.exs
def deps do
  [
    {:mux, "~> 1.8.0"}
  ]
end
Videos stored in Mux are called assetsAPI. To create your first video asset, send a POST request to the /assets endpointAPI and set the "input" property to the URL of a video file that's accessible online.
Note that Mux does not store the original file in its exact form, so if you want to retain your masters, don't delete them after submitting to Mux. Mux will also never need to download your video file again, unless you use it to create more assets.
curl https://api.mux.com/video/v1/assets \
  -H "Content-Type: application/json" \
  -X POST \
  -d '{ "input": "{INPUT_URL}", "playback_policy": "public" }' \
  -u ${MUX_TOKEN_ID}:${MUX_TOKEN_SECRET}
The response will include an Asset ID and a Playback ID.
- Asset IDs are used to manage assets using
api.mux.com(e.g. to read or delete an asset). - Playback IDsAPI are used to stream an asset to a video player through
stream.mux.com. You can add multiple playback IDs to an asset to create playback URLs with different viewing permissions, and you can delete playback IDs to remove access without deleting the asset.
{
  "data": {
    "status": "preparing",
    "playback_ids": [
      {
        "policy": "public",
        "id": "TXjw00EgPBPS6acv7gBUEJ14PEr5XNWOe"
      }
    ],
    "mp4_support": "none",
    "master_access": "none",
    "id": "01itgOBvgjAbES7Inwvu4kEBtsQ44HFL6",
    "created_at": "1607876845"
  }
}3Wait for "ready"
Full API ReferenceAPIAs soon as you POST a video, Mux begins downloading and processing the video. For shorter files, this often takes just a few seconds. Very large files over poor connections may take a few minutes (or longer).
When the video is ready for playback, the asset "status" changes to "ready".
The best way to do this is via webhooks. Mux can send a webhook notification as soon as the asset is ready. See the webhooks guide for details.
If you can't use webhooks for some reason, you can manually poll the asset APIAPI to see asset status. Note that this only works at low volume. Try this example:
Auto-populate an example request:
curl https://api.mux.com/video/v1/assets/{ASSET_ID} \
  -H "Content-Type: application/json" \
  -u ${MUX_TOKEN_ID}:${MUX_TOKEN_SECRET}
Please don't poll this API more than once per second.
4Watch your Video
To play back an asset, create a playback URL using the PLAYBACK_ID you received when you created the asset.
https://stream.mux.com/{PLAYBACK_ID}.m3u8implementation 'com.google.android.exoplayer:exoplayer-hls:2.X.X'
// Create a player instance.
SimpleExoPlayer player = new SimpleExoPlayer.Builder(context).build();
// Set the media item to be played.
player.setMediaItem(MediaItem.fromUri("https://stream.mux.com/{PLAYBACK_ID}.m3u8"));
// Prepare the player.
player.prepare();See the playback guide for more information about how to integrate with a video player.
After you have everything working integrate Mux Data with your player for monitoring playback performance.
Preview your video at stream.new/v/{PLAYBACK_ID}
Stream.new is an open source project by Mux that allows you to add a video and get a shareable link to stream it.
Go to stream.new/v/{PLAYBACK_ID} to preview your video streaming. This URL is shareable and automatically generated using the video playback ID. Copy the link below and open it in a browser to view your video.
https://stream.new/v/{PLAYBACK_ID}5Manage your Mux assets
After you have assets created in your Mux environment, you may find some of these other endpoints handy:
- Create an assetAPI
- List assetsAPI
- Retrieve an assetAPI
- Delete an assetAPI
- Retrieve asset input infoAPI
- Create asset playback IDAPI
- Retrieve asset playback IDAPI
- Delete asset playback IDAPI
- Update MP4 support on assetAPI
- Update master access on assetAPI
- Update asset trackAPI
- Delete an asset trackAPI
More Video methods and descriptions are available at the API DocsAPI.
6Video FAQs
Can I add multiple audio channels or tracks to my video?
No, we currently support only one audio track for all videos and live streams.
You may want your users to be able to select a language on the player and view a video showing the same content but playing different audio. One workaround would be first, ingest multiple videos with one in each language. Then add logic to the player to switch between different playback URLs when the user changes the language.